Tutorial: Create your own vCloud Director vApp hot clone in less than one hour
This article is the first tutorial covering a practical use of the recently released VMware vCloud Director plug-in. It is meant to be educational rather than exhaustive.
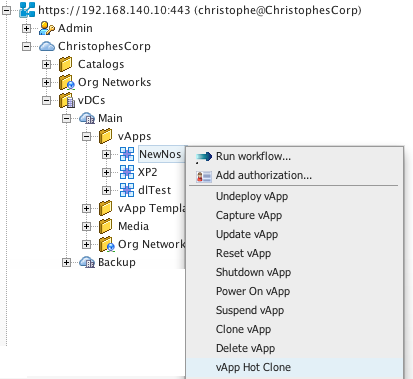
A while ago I wanted to make a copy of a running vCloud director vApp. When you use the vCloud Director user interface as an Organization Administrator you have the following options:
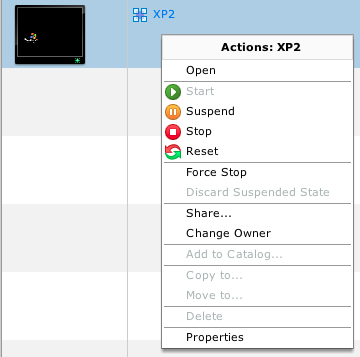
Copy operations are grayed out.
While there is certainly a very good reason for not supporting copy of running vApps I wanted to explore this further with leveraging the vCloud API through the vCenter Orchestrator plug-in for vCD.
By completing the following tutorial you will be able as an organization admin (or user granted with rights to copy vApps) to make a copy of a running vApp to any of this organization virtual Data Center (vDC).
If you do not have the time or resources to do this or want a more sophisticated or different vCD Orchestration solution being implemented for you, please check here.
Pre-requisites:
Concepts covered in this article include:
- How to use the vCloud Director library workflows to create your own workflow
- How to map inputs, outputs, and attributes
- How to write custom scripts and actions using the vCloud API (4 simple lines)
This tutorial should be suited for vCenter Orchestrator beginners.
Creating the hot clone vApp workflow
Log in the vCO Client.
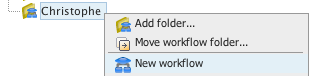
Click on the workflow tab, right Click on an existing category (or create yours) and click on new Workflow.
Name it "vApp hot clone". Click Ok

Right Click on it / Edit.
Set an initial version if desired, then click the Schema tab.
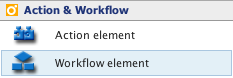
In Action & Workflow Select "Workflow Element" and drag and drop it on the schema.

Use the search filter with typing "clone vapp" and select Clone vApp, select Ok.
Right Click on the Workflow and select "Synchronize Presentation". This will automatically create the input parameters and their presentation.
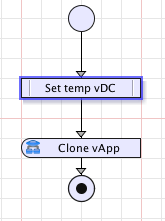
Click "Save" in the bottom right corner. Get back to the schema and link the elements together.
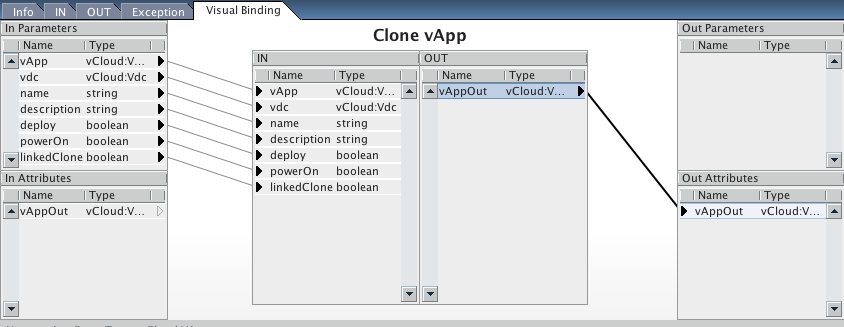
Click on the Clone vApp workflow in the schema.
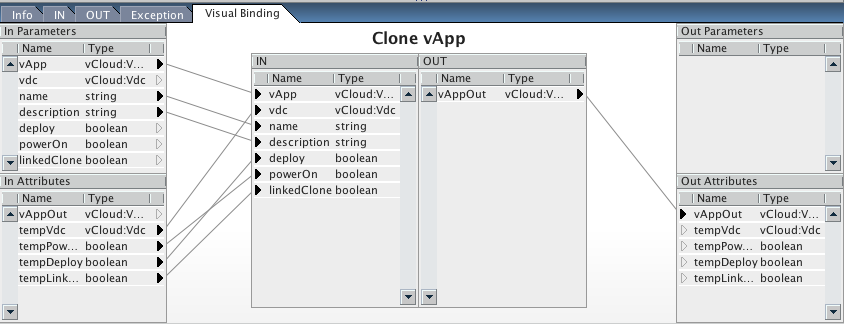
Click in the "Visual Binding" tab. Link the vAppOut Out parameter of Clone vApp to the "Out Attributes" box in the bottom right. Select OK to have the attribute created. You should obtain the following:
Get back to the schema and click on validate.

If you forgot the end element click on the link to create it. if you did everything as described above you should have something like this:
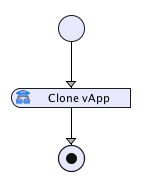
What you have done is called "wrapping" : inserting an existing workflow into your own workflow and linking their input / outputs.
You can now save and close and run your workflow (right click / Start). Make sure you pick up a vApp name different than the ones existing in all the organization. These must be unique across the organization.
If your vApp is powered off or if it is powered on and you clone it to the same VDC: Success !
If you want to clone the vApp to a different vDC it is not going to work:
If you select the failed workflow run and the variable tab on the right pane you will see at the bottom of the screen the following Exception message:
"The requested operation could not be executed on vApp "XP2". Stop the vApp and try again."
While this is still an improvement over the vCD UI that does not allow copying running vApps you can have good reasons for wanting to clone vApps another vDC. For example you may want to make a copy of your vApp to a backup / test / dev VDC being backed with low cost storage / servers.
Since at first, my tests were focusing on cloning a running vApp to another vDC any of my attempts to clone, compose (adding a new App from existing vApp or vApp template VMs), recomposing (updating an existing vApp) lead to this error message.
To work around this I had implemented a complex vCenter + vCD workflow. While I had some success with it, this was not something VMware could support since using vCenter to operate differently than how vCloud director does could lead to possible compatibilities issues with current or in later vCD / vCenter versions. After some more trial and errors I finally found out that the error can be avoided if the destination vDC is the same as the source and imagined a simple solution !

This can be implemented with making the clone in two steps. At first a hot clone in the same vDC and then moving the powered off cloned vApp from one vDC to another with a second clone and deleting the intermediary copy .
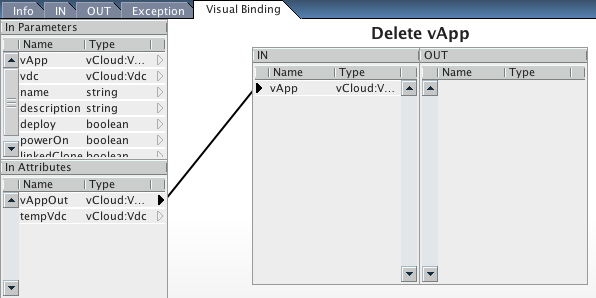
For this we need first to modify the "Clone vApp" bindings to enforce cloning to the same vDC and not powering on / deploying the vApp to allow for the second clone:
Click on the Clone vApp workflow on the schema / "Visual Binding" tab. Link the Clone vApp vdc input to the left bottom box. A dialog box will open to create a new attribute. Rename it "tempVdc" and click Ok. Repeat this operation for creating a tempPowerOn, tempDeploy and tempLinkedClone attributes. These will be defaulted to "false". Link clones are not enabled yet in vCloud Director so there is no need to keep this as an input parameter. You should get this.
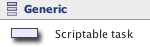
Now we need to set the tempVdc attribute. In the Generic palette select "Scriptable task" and drop it on the schema above the vApp Clone workflow.
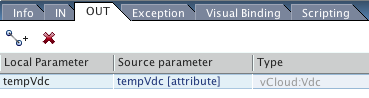
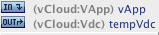
Click on the Scriptable task "OUT" tab, click on the + to choose an output attribute. Select tempVdc. You should get this:
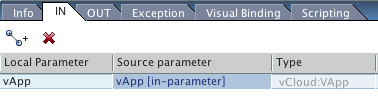
Click on the Scriptable task "IN" tab, click on the + to choose an output attribute. Select vApp. You should get this:
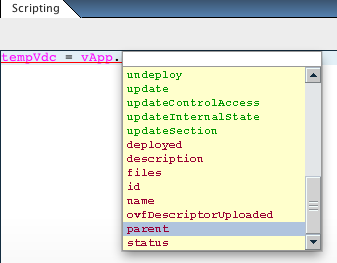
Now, click on the Scriptable task "Scripting" tab. You are going to type"
"tempVdc = vApp.parent;"
For doing this rapidly without typo you click in the script box and then click on the tempVdc OUT link, press space, press "=", press space, click on the vApp IN link, press ".", press ctrl-space.
This will open a completion list with all methods (green) and all attributes (red) available for an object of type vApp. Select Parent and finish your line with a ";"
If you look at the vCO inventory you will see that all the vApps are under a given vDC. The parent attribute will set the tempVdc attribute with the vDC hosting the vApp we want to clone. Rename the scriptable box and link it as below:
Before performing the second clone we need to check if the input parameter destination vDC is different than the parent of the vApp. If not there is no need to continue the workflow. For this we are going to use a Custom Decision box from the Generic Palette.
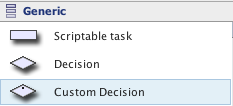
Drag and drop it on the schema below the first clone. Rename it "Need relocation ?"
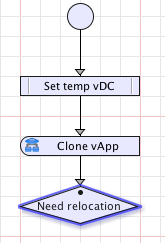
Click on the Decision "IN" tab, click on the + to choose an input attribute. Select vdc and then tempVdc. You should get this:
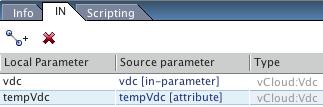
Now, click on the Scripting" tab. You are going to type: {code}return (vdc.getReference().href != tempVdc.getReference().href);{/code}

Why not write the following ? :
return (vdc != tempVdc);
The vCD plug-in relies on the Java SDK, relying on the vCloud REST API. The Java SDK does HTTP GET, PUT, POST, DELETE of XML files and convert these back and forth to Java object. The vCD plug-in present these objects in JavaScript so you do not need to be a Java developer to write workflows. When converting twice a same REST object from XML to the Java object (process called deserialization, inflating or unmarshalling) it is possible that it creates two different Java objects and their Javascript representation. While future version of the plug-in may make sure this does not happen by re-implementing "==" it is best practice when comparing vCD objects to compare them by their unique ID. In REST case this is the HREF of the object that is a property that can be obtained by calling the getReference method. When objects have unique name within their parent it is also possible to compare the name property but this does not work for all objects. For example vApp Templates can have several time the same name within a vDC.
Next we will need to rename the Cloned vApp before cloning it a second time (remember: vApp names are unique per Organizations). In the Generic palette select "Scriptable task" and drop it on the schema below the Decision box. Rename it "Rename vApp".
Renaming a vApp generates a task in vCloud Director. Before getting to the next step we need to wait for the task to complete. For this we will use the "Wait for task" workflow. In Action & Workflow Select "Workflow Element" and drag and drop it on the schema.
Use the search filter with typing "wait for task" and select as below.

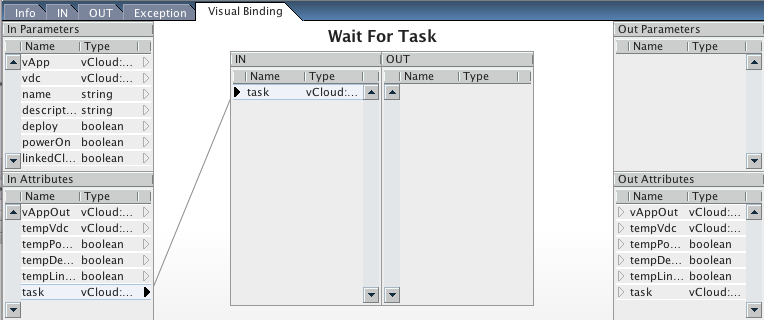
Click in the "Visual Binding" tab. Link the task IN parameter of Wait For Task to the "IN" Attributes box in the bottom left. Select OK to have the attribute created. You should obtain the following:
Click on the IN tab of the "Rename vApp" Scriptable Task. Click on the + to choose an input attribute. Select vAppOut. vAppOut is the output of the first clone.
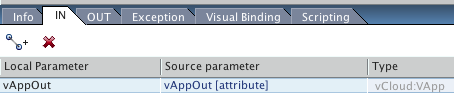
Click on the OUT tab . Click on the + to choose an output attribute. Select task. You should get this:

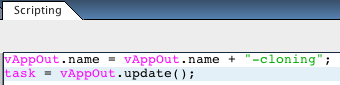
Now, click on the Scripting" tab. Type:
vAppOut.name = vAppOut.name + "-cloning";
task = vAppOut.update();
We are appending "-cloning" to our temporary vApp before cloning it to its final name. The update method perform the update on the vCD server. Update returns a task that will be monitored by the "wait for task workflow"
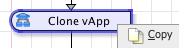
Now we need to add the second clone and the delete workflows. For the first one we can copy and paste the one we already have. Right click / Copy.
And Paste on the schema.
In Action & Workflow Select "Workflow Element" and drag and drop it on the schema.

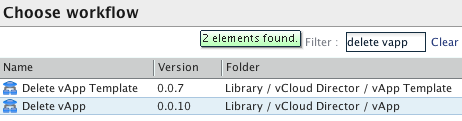
Use the search filter with typing "delete vApp" and select as below.
Click in the "Visual Binding" tab. The autobinding feature may have already linked the vApp input parameter of our workflow to the one of the Delete vApp. Make sure you change this with linking the task IN parameter of Delete vApp to the vAppOut "IN" Attribute in the bottom left box. You should obtain the following:
Since we copied and pasted the first clone we need to adjust the second clone Visual Bindings:
- Click on the second Clone vApp workflow in the schema
- Click the Visual Binding tab
- Relink "Clone vApp" vApp to "in Attribute" vApp Out: We need to clone the result of the first clone, not a second time the original vApp.
- Relink "Clone vApp" vdc to "in Parameter" vdc : We now need to clone to the vDC that was provided as input of our workflow.
- Relink "Clone vApp" powerOn and deploy to their "in Parameter" counterpart : We want to observe these settings as well.
- Relink vAppOut to the top right out parameter box. This will open a window to create a out parameter. Name it clonedVApp: it is best practice to output the result of your workflow (here the cloned vApp). This will allow to insert this workflow in other workflows that will be able to use the returned vApp.
Now make sure all the boxes are linked. Once done you can use the validation to help you.
Here the former linked clone input parameter generates a warning since we replaced it with an attribute with a fixed value. You can Click on the Quick fix action "Delete parameter link" to get rid of it.

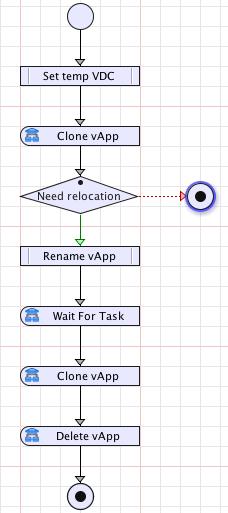
Your workflow should look like this:
Increment your version number with an appropriate comment.
Save and close. Run your workflow again. This time it will last more time but should be successful at hot cloning a vApp from one vDC to another one.
In the Tools menu / User Preferences / Inventory there is a "Use contextual menus in inventory" check box. You can check it if not already done.
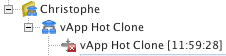
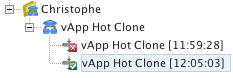
Now From the Inventory tab you can start your hot vApp Clone with right clicking on a selected vApp:
Congratulations, you should now have a workflow capable of performing a hot clone of a vApp in your vCloud Director environment.
