Remove computer from AD using vCO during vCAC Decommission
As vCloud Automation Center (vCAC) gains traction, so too does the need for details on how to extend it using vCenter Orchestrator (vCO). I have kept an eye out for good articles on vCAC and just saw a great one at the DailyHypervisor.com blog around Adding a computer account to Active Directory OU. This is something that we had done for LifeCycleManager (LCM) quite some time back and feel it is a good candidate for a vCO-centeric article. So a quick thanks to Sid Smith for his article. Our focus will be on deleting the Computer Object from Active Directory when the Machine gets decommissioned. The techniques described here will help understand the steps needed for other integrations as well. This task can obviously be performed by PowerShell, dsrem.exe, and any other number of methods, but this article will provide you with a vCO way to do it. It should also be noted that vCAC has an AD Clean-Up wizard that will remove the machine record form AD when configured, but it may not have the logging capabilities that are used in this vCO example.
Dependencies
vCloud Automation Center (vCAC)
- Configured with at least one vCO Endpoint
- Configured with at least one Windows Template
- Design Center installed/configured
vCenter Orchestrator (vCO)
- Active Directory Plug-in for vCenter Orchestrator (tested with version 1.0.2 and 1.0.3 of the plug-in) Release Notes
- vCO Package file imported FILE: com.vmware.coe.ad.deletedisablecomputer.package
Before getting started, we’ll need to create a vCO workflow that gets triggered by vCAC. For the input, we’ll just want the name and a true/false to indicate whether the computer account should be deleted or just disabled (default).
vCO Workflow - Delete or Disable ComputerAD by Name

The workflow shown above is contained in the attached package file. It consists of a custom action that gets an AD:ComputerAD object from the computer name string that is passed into it. It then, checks the “deleteComputer” input variable to see whether the workflow should Delete or simply Disable the computer account. Once the action is determined, it is logged and performed. In the case of an error during the action, System and Server logging takes place and an exception is thrown.
Here’s a look at the content of the getComputerADbyName action:
|
|
As you can see, the script performs a recursive search of Active Directory to locate the computer account. It then checks each result’s lowercase value to against the input computerName’s lowercase value to ensure a match. Once the match is found, it is returned to the calling workflow. If no match is found, an exception is thrown and logged.
Modify vCAC Workflow Stub to execute vCO Workflow
You’ll now need to open the vCAC Designer (Start -> Programs -> VMware -> vCAC Designer) so that the workflow stub can be modified. Since we want this particular workflow to execute upon decommission, we’ll need to modify the WFStubMachineDisposing workflow. (You could optionally use the WFStubUnprovisionMachine instead of WFStubMachineDisposing)
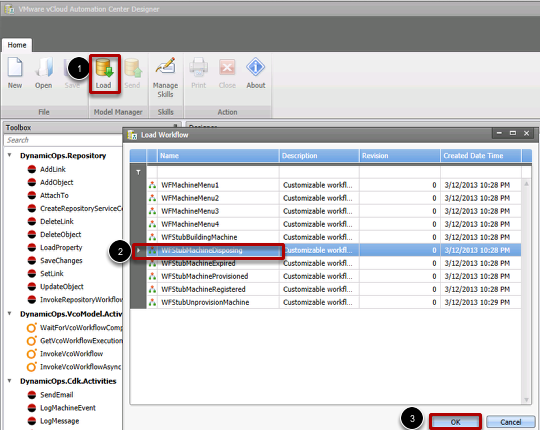
After you Open the vCAC Designer:
- Click on Load in the Menu bar
- Select the WFStubMachineDisposing workflow.
- Click OK
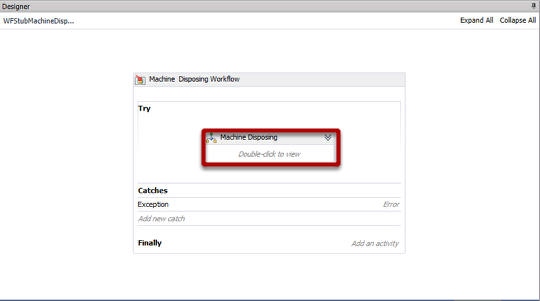
Double-Click “Machine Disposing”
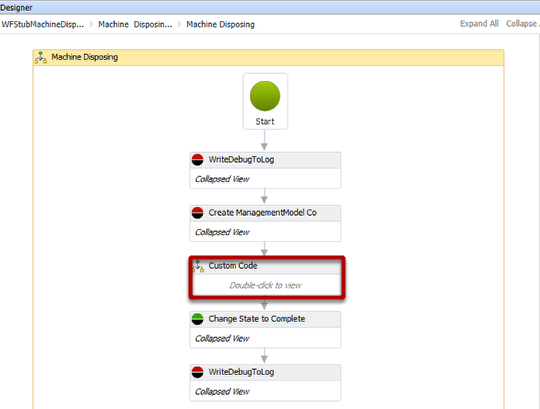
Double-Click “Custom Code”
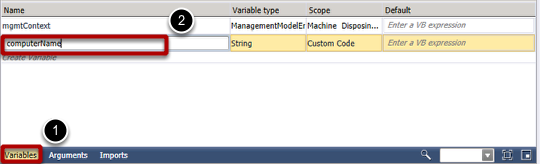
The first thing you’ll need to get before you can call the vCO workflow is the Machine information. We’ll need a variable to store the computerName we extract from the workflow:
At the bottom of the Custom Code Window:
- Click Variables
- Now Click the Create Variable line directly under the mgmtContext variable, and name the new variable computerName (This variable will be used later and it IS Case sensitive). Leave the Variable type as String and Scope as Custom Code
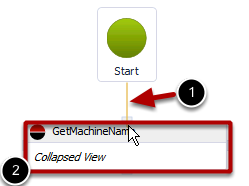
So, Drag the GetMachineName activity and position it below the Start
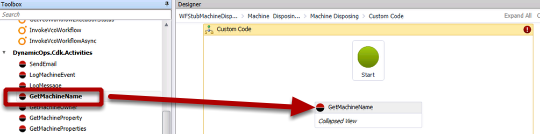
- Now connect Start to GetMachineName by hovering over start until you see the little connectors show up, then click and drag down to GetMachineName
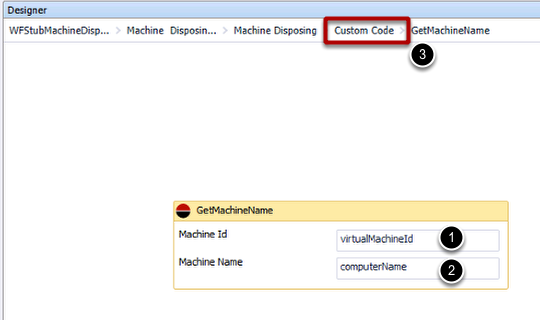
- Double-click the GetMachineName activity and fill in the Machine Id and Machine Name as follows.
Fill in the boxes as follows: Note: Case Sensitive
- Machine Id to “virtualMachineId”
- Machine Name = computerName
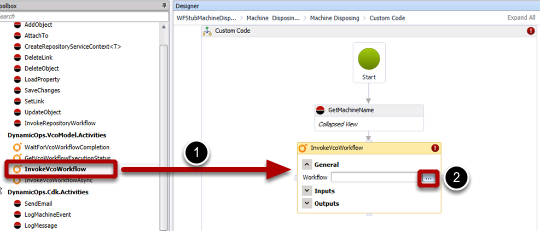
- Now Click Custom Code at the top of the screen to return to the custom part of the workflow
- Click and Drag the Invoke vCO Workflow activity onto the workflow and connect it to the GetMachineName activity
- Click the elipsis button to select the Workflow
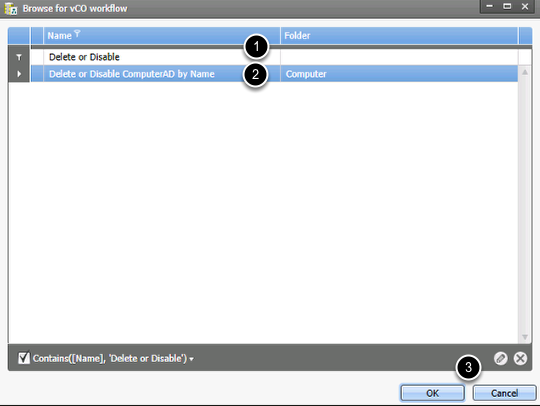
- Start typing “Delete or Disable” in the top filter box
- Select the Delete or Disable ComputerAD by Name workflow
- Click OK
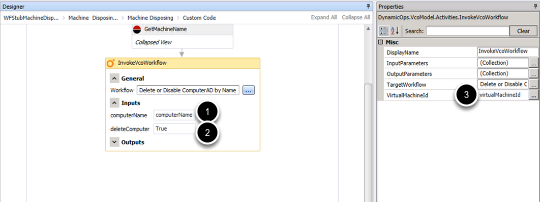
- Enter the variable we created earlier into the computerName field… note that our variable name is also “computerName” and is case sensitive
- Enter “True” for the delete Computer field. If you prefer to simply Disable the computer account in AD instead of Delete, then enter False in this box
- Enter virtualMachineId in the VirtualMachineId proprties field in the right pane
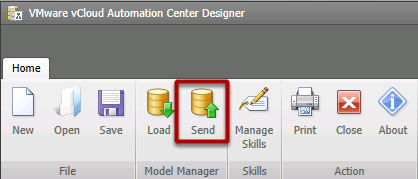
Confirm that there are no Errors in the workflow. Errors will be indicated by a red exclamation point icon in the top right of workflow activities. Once you have confirmed there are no errors, click the Send button in the toolbar.
Enter a brief description in the box provided and click OK
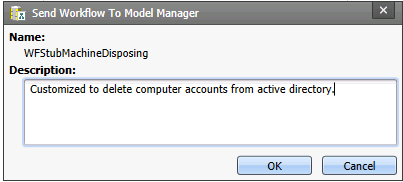
Click OK on the Success message window
Configure vCAC to use the call-out to vCO
In order for the custom work to actually be used by vCAC we need to configure a custom property that tells it to enable one of the stubs. In our case, this is the MachineDisposing stub. You may refer to page 18 of the vCAC 5.1 Extensibility guide for a table listing each of the stubs and the corresponding property.
To enable this particular call-out, add the following property to a blueprint that is to be added to a domain:
ExternalWFStubs.MachineDisposing
Note: no value is required for the property above, the property simply has to exist and be bound to the blueprint in order for it to be used.

Now, go ahead and provision a VM using that blueprint and confirm that a domain account was created in the Computers container or whatever OU it was configured to be placed in. Once you have confirmed that an account exists, Use the vCAC interface to Destroy the computer. This should trigger the MachineDisposing stub that we have created, resulting in the AD account beling deleted (or disabled) depending on how you configured your workflow.
