SQL Plug-in + DynamicTypes = Simple CMDB for vCAC - Part 1
This multi-part series will step you through the process of mapping a Microsoft SQL Server table into vRealize Orchestrator, building out a DynamicTypes plug-in inventory based on that table (using my workflow package), then exposing it to vRealize Automation’s Advanced Service Designer (ASD).
Introduction
vRealize Automation (vRA) features an Advanced Service Designer (ASD) that allows for you to offer nearly anything as a service (XaaS). In order to take advantage of that feature, it requires a vRealize Orchestrator (vRO) Inventory object. This means you must have a plug-in that provides such an inventory. In the past, this meant Java skills to build out a plug-in. This, fortunately, is no longer the case with the Dynamic Types plug-in. We touched on this plug-in in the past with regards to using the HTTP-REST plug-in. This article will take a different approach in that we will use the SQL Plug-in to provide our back-end service - a mini CMDB consisting of Server names and IPs.
NOTE/WARNING: This package was developed and tested with a Microsoft SQL Server. As such, the query in the action “com.vmware.coe.sql.getTableColumnNames” is likely to only work with a SQL Server. If you are using PostgreSQL, MySQL, or Oracle, you will likely need to modify the first line of this action to reflect the proper syntax of retrieving a record.
This first article will cover the following topics:
- Microsoft SQL Server Database Table for use in tutorial
- How to determine JDBC URL for use with the SQL Plug-in (or jdbc plug-in)
- Adding the Database table to vRO
Future articles will build upon the work performed here. They will cover:
- How to create a Dynamic Types Plug-in Inventory using my workflow package
- How to add the simple CMDB to vRAs Advanced Service Designer
The Database
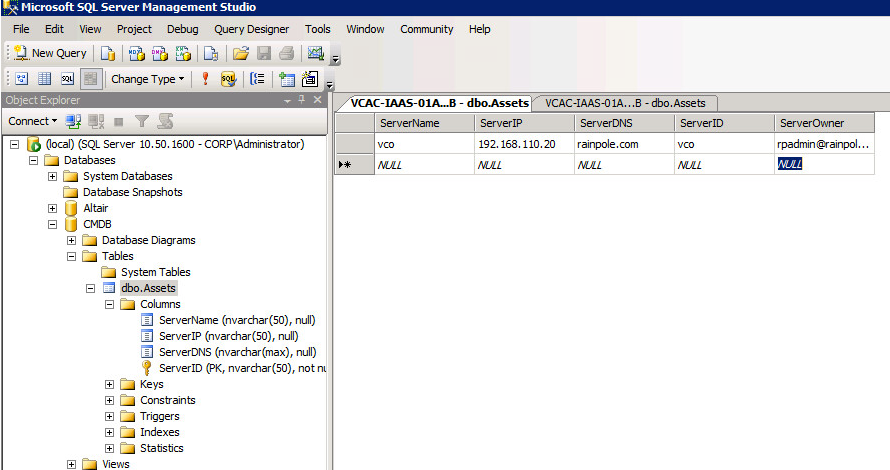
For this tutorial series, we will keep things very simple. Our CMDB will consist of a single “Assets” table. The table will reside in a database named “CMDB” on a SQL Server 2008 R2 server (vcac-iaas-01a.corp.local).
The table will have only 5 fields:
- ServerName - Hostname of the server
- ServerIP - IP Address of the server
- ServerDNS - Domain that server resides in
- ServerID - Unique ID of the server, for simplicity, this article will simply use the same value as the ServerName
- ServerOwner - e-mail address of the person who provisioned the system
Before proceeding, make sure you have a simple table created and available for you to connect to. Also be sure to note whether or not your database is listening on its standard port. In my case, SQL Server IS listening on port 1433.
Database Plug-ins and JDBC URL

vRO features two plug-ins capable of communicating with external databases: SQL Plug-in and JDBC Plug-in. Regardless of which plug-in you decide to use for your solution, you will require a JDBC URL to connect to a database. The syntax for the url can be tricky, but vRO ships with a handy workflow to help you figure that out: JDBC URL generator
Run that workflow now.
JDBC URL generator - Screen 1
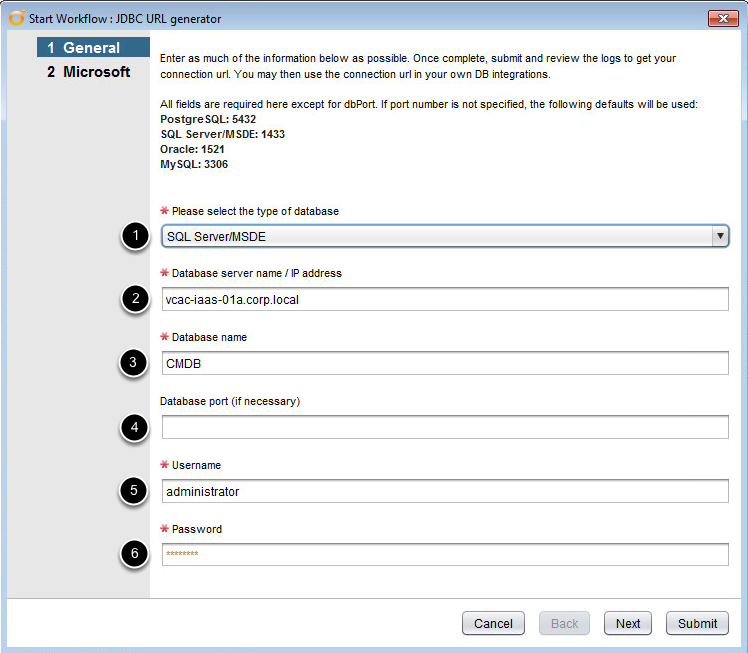
In my lab environment, the vcac-iaas-01a server is running SQL Server 2008 R2 and is a member of the corp.local domain. Additionally, the default instance is being used and Windows authentication is enabled.
- Use the drop-down to select your database. Based on my note above, I will select the SQL Server/MSDE entry
- Specify either the FQDN or IP Address of the Database Server
- Provide the name of the database you wish to connect to
- (OPTIONAL) Provide the database port - if left blank, the default port will be used as specified by the description above the inputs based on the type of database chosen
- Provide the username of an account with permission to add/remove content to the database
- Provide the password for the account
JDBC URL generator - Screen 2
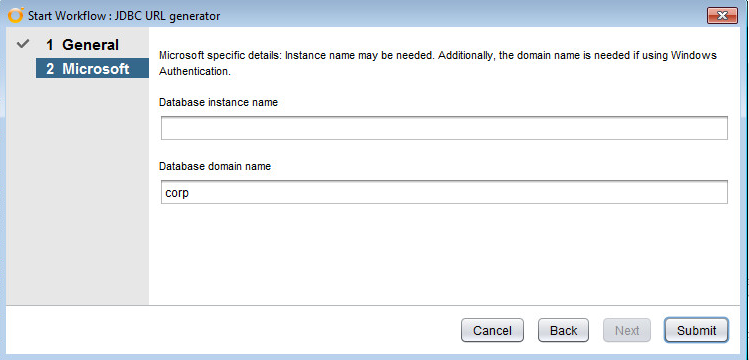
If the Microsoft database (SQL Server/MSDE) was chosen in the first screen then an additonal screen will be presented so that you may specify an optional instance name and domain name.
- If using the default instance of SQL Server, it should be safe to leave this field blank. Otherwise, specify the appropriate Instance Name that holds your database.
- If your database server is a member of a domain and is using WIndows based authentication, enter the Windows Domain here as shown in the screenshot above. If you are using a standalone SQL Server with Windows authentication (local accounts) then specify the server’s HostName in this field.
Click submit
Upon submission, vRO will construct the JDBC URL then attempt a connection to the database using that URL and the credentials provided.
JDBC URL generator - Results
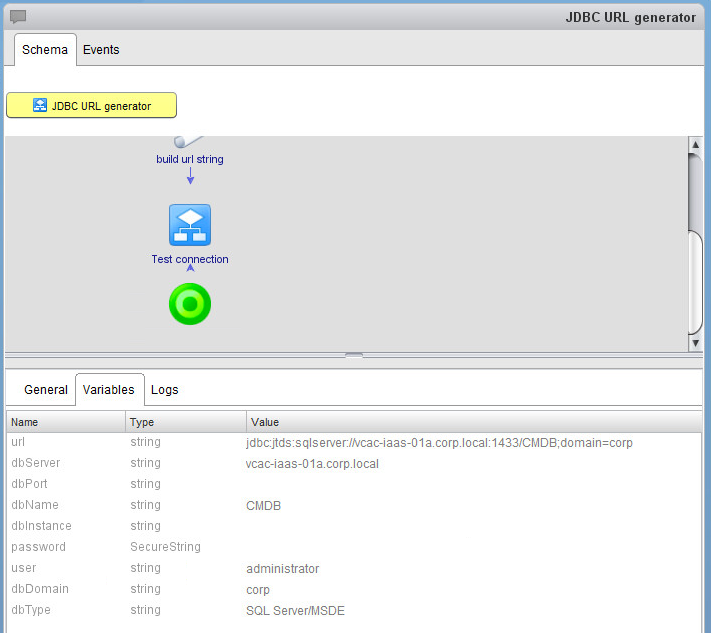
Review the Logs tab or the Variables tab to obtain your JDBC URL (Connection string).
If the workflow fails, you may need to try different variations of your inputs. Most commonly, I have seen issues around not having the correct port specified / DB listening on dynamic port instead of default, specifying invalid credentials, specifying an invalid database instance, or missing/incorrect domain name.
When successful, the Logs tab should contain text like this:
|
|
You should now have the necessary connection string for use in the SQL and JDBC workflows to connect to a database!
Add SQL Database to vCO

Now that we have the JDBC URL, we can run the Add a database workflow (found under Workflows\Library\SQL\Configuration)
For the Name input, this is the display name shown in the vRO Inventory so set it to something friendly and that makes sense. In my case, I will simply call it CMDB - I could just as well name it “Server Inventory).
Choose the Database Type, then paste in your connection url from the workflow you ran in the last step.
On the next screen, I suggest using Shared Session, then providing the same credentials as you used in the JDBC URL generator workflow.
Upon submission, your Logs tab should display something similar to this:
|
|
Verify SQL Inventory
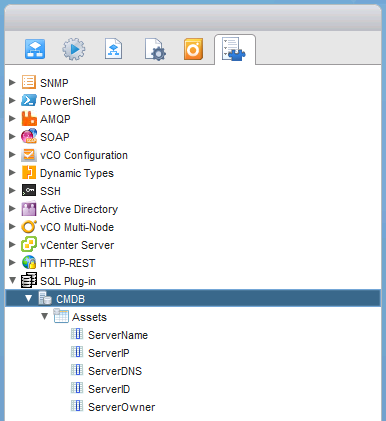
View the Inventory of your vRO Server and expand the SQL plug-in to confirm that the “CMDB” entry is there and you can see the tables in the database.
Create Folder for CMDB Workflows
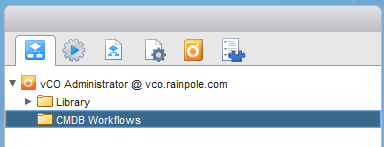
Return to the workflows tab in the vRO client and create a new root folder named “CMDB Workflows”
We will use this folder in the next step…
Generate Workflows to manage the table
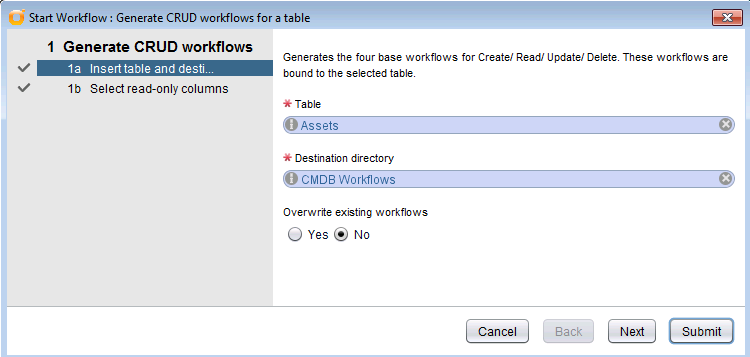
We are now ready to generate some simple CRUD (Create Read Update Delete) workflows for our Assets table.
- Run the Generate CRUD workflows for a table workflow
- Select the Assets table and then specify the CMDB Workflows folder (Workflow Category) as the destination
- Click Submit
Verify Workflows are Generated

Confirm that the four workflows have been created in the folder specified…
NOTE/WARNING: It seems that in version 5.5.2.1 of vRO, there is a small bug (I have just reported this to Engineering) that does not bind the “databaseResource” attribute to the ResourceElement object properly. This “Not found” value will prevent the workflows from validating or running properly. If this happens for you, it is pretty simple to fix. Just EDIT each of the four generated workflows, and DELETE the “databaseResource” attribute from the General tab AND remove it from the “IN” binding of the Scriptable task.
Be sure to Test / Adjust each of these CRUD workflow to make sure they function with the Database you are using. With the slight mod above, they work fine for me with SQL Server, but I needed to modify the query syntax when working with PostgreSQL.
Wrapping up
This concludes the first article in the series. Stay tuned for additional articles that will build upon the database table we have mapped here in this article.
