Create a simple vCO self service VM Provisioning Portal - Part 1
This article is the first in a series of tutorials for developing a basic VM self service portal. It is meant to be educational rather than exhaustive. Other articles will follow up for supporting more advanced features and a less static configuration.
Concepts covered in this article include:
- How to create a simple Workflow
- How to map inputs, outputs, and attributes
- How to launch a Workflow from a webview, using the vCenter Orchestrator Weboperator
- How to launch a Workflow from the vCenter Orchestrator Client
Developing the provisioning Workflow
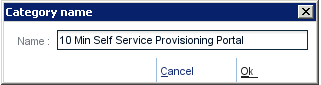
First log in with the vCO Client, then Click on the Workflows tab and add a category (right Click / "Add Category..."). The Category helps organize your custom Workflows.

You can now name it.
Now create a new Workflow (right Click / "New Workflow").
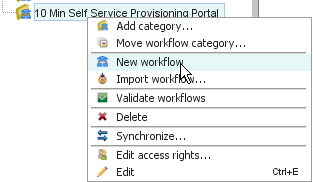
You can now name it.

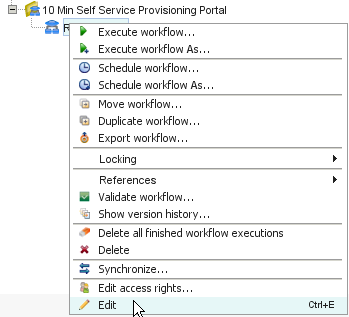
Now that an empty Workflow has been created you can edit it (right click / Edit or Ctrl+E).
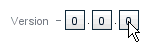
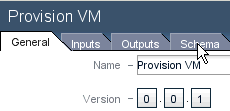
While not mandatory, it is recommended to edit the version of the Workflow every time you make a change. (Click on the last Version digit).
Now enter an initial comment and click OK.

We are now ready to create the content of the Workflow. For doing so click on the Schema tab.
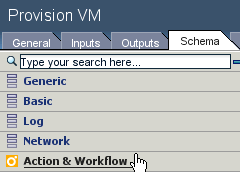
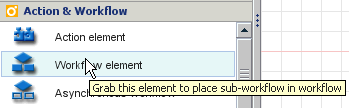
To provide the provisioning functionality to our Workflow we will use one of the many building block Workflows available in the vCenter library. To do so click on "Action & Wokflow" in the left pane.
Now drag and drop the "Workflow element" palette item on the schema.
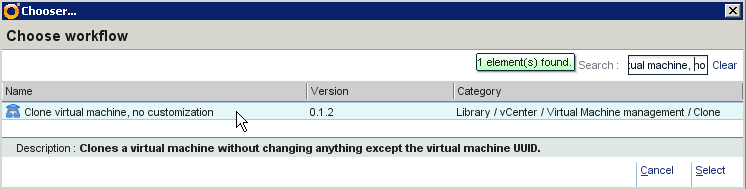
The chooser is now expecting you to provide the name of the Workflow you want to insert in this schema. In the search box type in "Clone virtual machine, no customization". There are several clone Workflows so you want to make sure you entered enough text to filter down to one single Workflow. Click on the Workflow and then on "Select".
Please note that the Workflows showing in this list depends on what version of vCO you are running and on what additional plug-ins you have installed. You may eventually have two Workflows with similar name in a different category such as vCenter and VIM 35.
Click on the "Visual Binding" tab. The visual binding will help you automating the data flow with the creation and linkage of the different inputs, outputs and variables.

The boxes in the middle represent the inputs and outputs of the library Workflow you have just inserted into your custom Workflow. This Workflow has nine inputs and one output.
The boxes on the side represent your Workflow inputs, outputs and attributes. The inputs feed your Workflow with necessary or optional parameters. The inputs can either be manually entered (such as when the Workflow is started manually i.e the Workflow you are creating) or passed as parameters automatically (such as when started by another Workflow or another system. i.e the Clone VM Workflow). The outputs are the results that will be returned on completion. The attributes are your Workflow internal variables. These are not accessible outside of the Workflow as represented in the visual Binding view. As of now you do not have defined any inputs, outputs or variable.

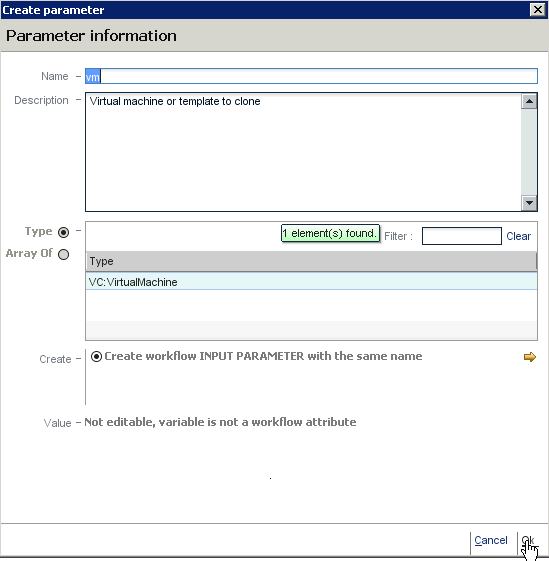
To create an input you can drag and drop the "Clone Virtual Machine" inputs in the top left "In Parameters" box.
The vm input in this Workflow is representing the VM or template to clone from. Many library Workflows have comments indicating the usage of the parameters. To check parameter comments you can switch to the "IN" tab. Switch back to "Visual Binding" tab. Drag and drop the vm input in the top left in Parameters box. This will bring the following window. All the different fields have been pre-filled for you. Click OK.
Now repeat the drag and drop operation for the vmName input.
We will link the other "Clone Virtual Machine, ..." inputs on pre-defined attributes that will not be visible by the end user.
To do so drag and drop the vmFolder input in the bottom left Attribute box. This will bring the following window.
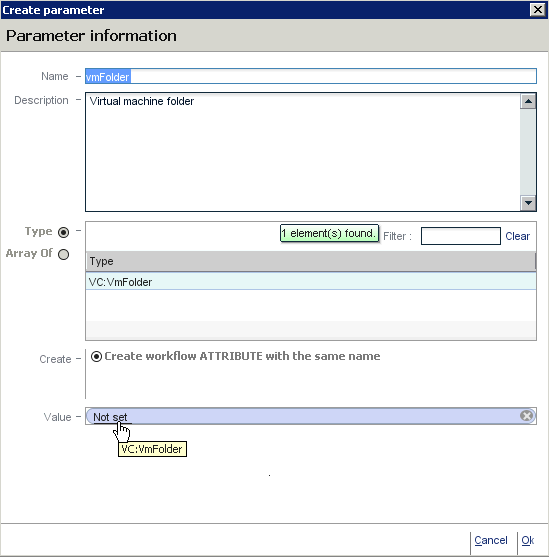
The window gives you the option to set this attribute with a value. Click on the "Not set" link in the Value field.
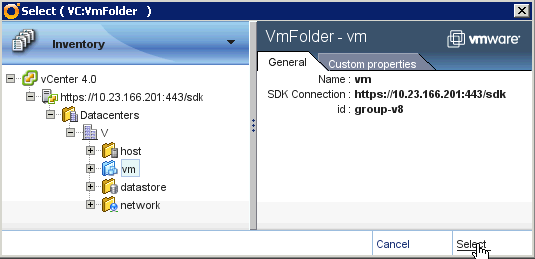
You should now see a treeview containing the vCenter(s) configured for this vCO server and their underlying virtual infrastructure. Drill down until you find the desired vmFolder you wish to place provisioned VMs into and click on the Select link.
Repeat the drag and drop operation with all the remaining IN parameters without forgetting to assign them values. Drag and drop the OUT parameter to the bottom right box to create a NewVm attribute. No need to set a value for this one, the Workflow will when completing.
Once completed the Visual Binding should look like this:

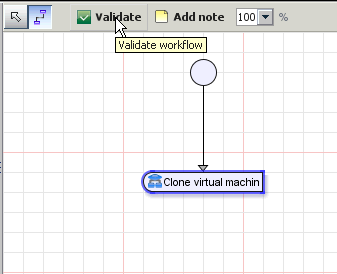
Now that the data flow is completed we need to complete the process flow. Select the link mode as follow (as an alternative you can ctrl click).

Now link the Start symbol in the schema view to the first Workflow. We will now validate the Workflow as follows
The validation will display a warning indicating we forgot to add the Workflow End symbol.
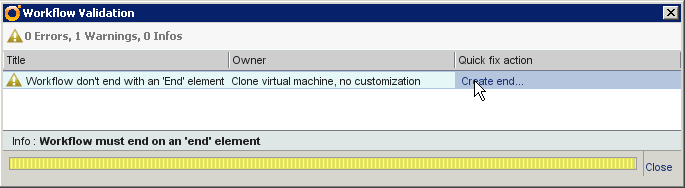
By clicking on "Create end ..." the Workflow will now validate.
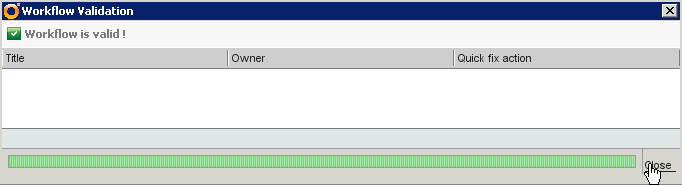
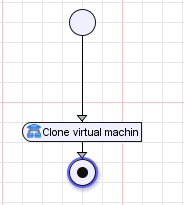
As you can see below the end symbol was added and linked automatically
Click on save and close. Congratulations you have completed the workflow.
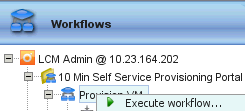
Testing the Workflow from the vCO Client
Right click on the Workflow and select "Execute workflow ..."
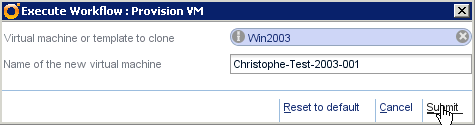
Select a template and name your new VM as wanted and submit.
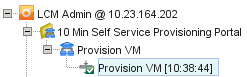
You will now be able to see the Workflow progress. The schema will enlighten the current step with navigating within the different Workflows and with updating the Workflows attributes. Once the Workflow will have completed you will be able to check these.

On the left pane you can see the Workflow status. If something wrong happened you can view the error message at the bottom of the Variables and in the Events tab.
Starting the provisioning Workflow through a web Browser
vCO has a build in web server able to deploy web pages called "Web views". The weboperator is installed with vCO. It is a basic web based Workflow operator client. Before closing your vCO client click on the Web views tab". If the web operator web view does not shows a Started status right click and Click publish.

To access the vCO web server type in your vCO server hostname or IP address (as shown in the vCO client title bar) on the 8280 port.

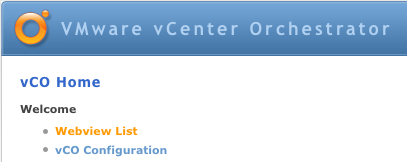
This is the vCO root level page. Click on the "Webview List" link.
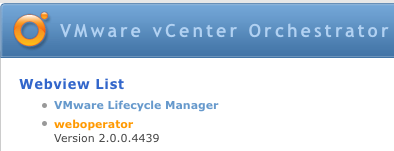
The next screen will list all the published Webviews. My server is running Lifecycle Manager. It may not be the case for yours. Click on weboperator.
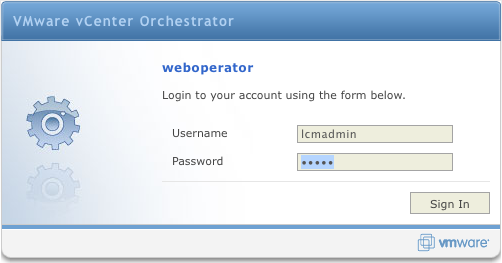
Now log in with a user that has rights to log in vCO.
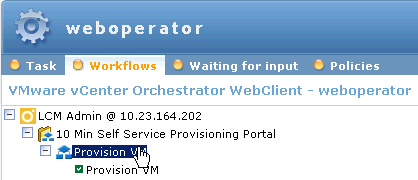
Now unfold the Workflow categories and select your Provision VM Workflow.
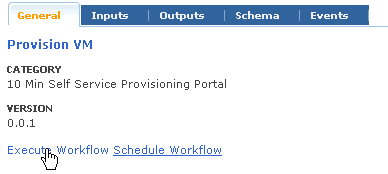
In the right pane click on "Execute Workflow".
Fill in the input fields (the first field support both typing in with completion and tree view using the magnifier). Click submit.

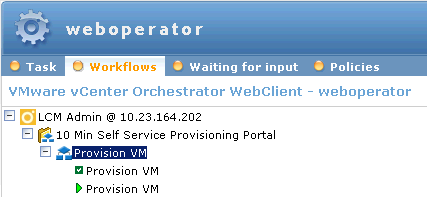
You will now see a new Workflow execution showing the Workflow is running. You can check the status with the schema tab. To update status and schema you may have to reload the page.
Congratulations you have started your Workflow through a web client !
 Download the package if you ran into problems
Next articles in Series:
Part 2
Part 3
